



How Connecting Loops Simplify Precast Wall Installation in Construction
Precast concrete wall panels are now standard across residential, commercial, and industrial projects. Factory casting lets geometry, finish, and concrete quality be verified before an element reaches site, and reduces the formwork, scaffolding, and wet trade work required on site.
The difficulty usually begins on site. A precast wall is a finished structural element rather than a raw material, so every panel must be set to line and level, every joint prepared, and every connection made so that it develops the load path assumed by the structural engineer. These activities compete for the same crane, access routes, and labour, and rework at one joint can stall the erection sequence for a whole floor.
Connecting loops address this phase of the work directly. They are cast into the panel edge during production, so the connection point already exists when the element arrives. This article explains how they work, how they simplify installation, and what to consider when specifying them.
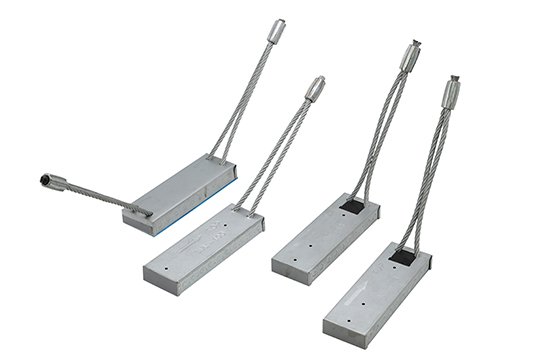
What Are Connecting Loops in Precast Construction?
Definition and Basic Structure
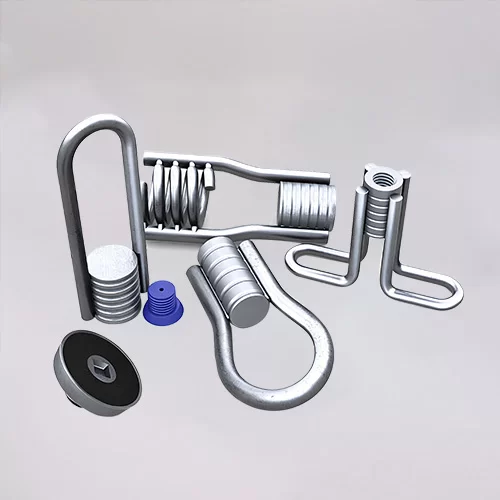
A connecting loop is a factory-installed device used to join adjacent precast concrete elements. Its core is a steel wire loop, usually formed from high-strength wire into a U or hairpin shape, anchored inside a protective housing embedded in the panel edge. The housing keeps the loop protected and correctly oriented through casting, transport, and erection.
The connection is finished on site: the exposed loop of one panel overlaps the loop of its neighbour, specified reinforcing bars are threaded through both, and the joint is filled with grout or fine concrete. Once the fill hardens, loop, reinforcement, and surrounding concrete act as one continuous joint — the loop is part of a system, not a standalone fastener.
How Connecting Loops Are Integrated into Precast Wall Panels
Loop boxes are tied to the reinforcement cage before concrete is placed and checked against the shop drawings for location, orientation, and cover. The housing face sits flush with the panel edge so the loop stays accessible after demolding, and a protective cap shields the recess until it is removed on site. The connection point is then ready without drilling, anchoring, or fabrication at the panel face.
Connecting Loops vs. Other Connection Methods
Welded connections depend on cast-in plates or exposed reinforcement and require hot work, certified welders, corrosion protection, and inspection of every weld. Bolted systems depend on accurate alignment of embedded plates and on safe access for tightening. Connecting loops rely instead on standard reinforcement and grouting, avoid hot work at the joint, and absorb a degree of positional variation. The right choice depends on structural design, load requirements, joint geometry, exposure conditions, and the applicable standards.
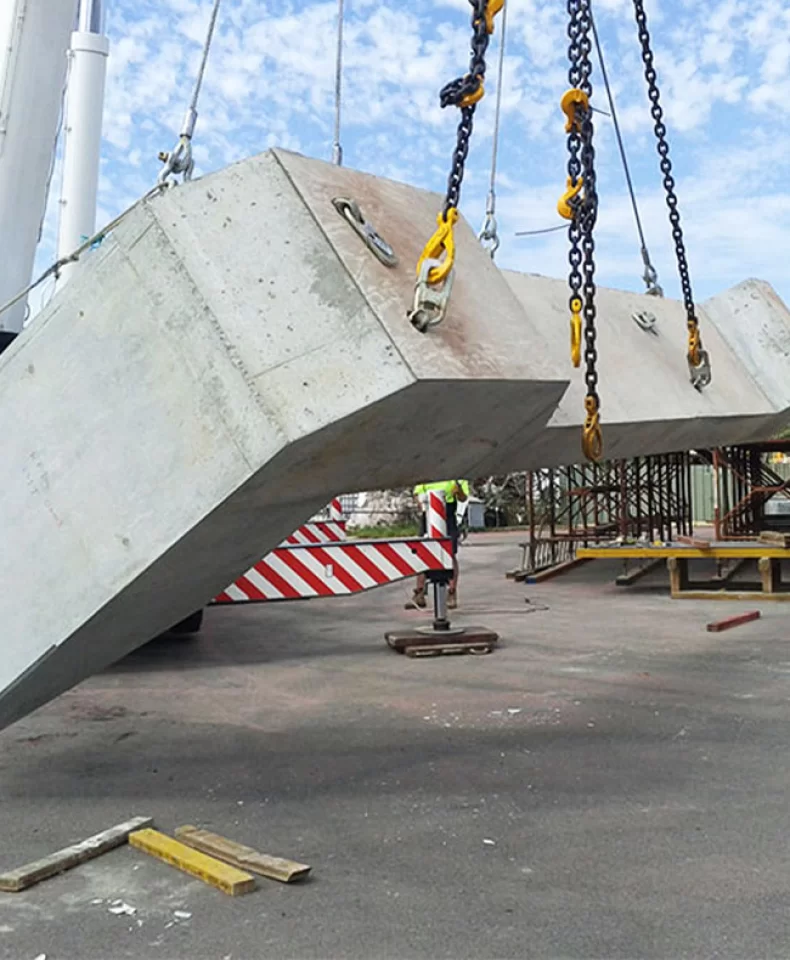
A note on terminology. Connecting loops are not lifting loops. Lifting loops and anchors are designed for handling and carry the element only during lifting and temporary support; connecting loops are structural components that transfer in-service forces between elements. Treating the two as interchangeable leads to incorrect specification and unsafe assumptions.
How Connecting Loops Simplify Precast Wall Installation
Simplifying On-Site Connection Procedures
Because the connection points are cast into the panels, site teams do not have to create them: there is no field welding, post-installed anchoring, or bracket fabrication at the joint. The work reduces to a short, repeatable sequence — remove the covering, align the panels, place the lapping bars through the designated loops, close the formwork, and grout.
Improving Panel Alignment and Installation Coordination
Loop positions, panel tolerances, and reinforcement layout are interdependent, and the joint detail only closes cleanly when the precast drawing, the structural drawing, and the site setting-out agree. Confirmed at drawing review and checked during production, the loops arrive matching their neighbours, and less site time is lost to adjustment.
Reducing Labour Requirements and Construction Delays
A standardized sequence reduces unnecessary handling and repeated work, and crews become familiar with it after the first few panels. Joint preparation also becomes predictable: the materials, tools, and inspection steps for each connection are known in advance, so they can be planned into the erection cycle.
Supporting Consistent Connection Quality
Factory-controlled positioning is the main quality advantage of the embedded loop: location, orientation, and cover are set under production conditions rather than in a variable site environment, and the same detail is reproduced across every panel of a type. Site consistency then depends on repeatable procedures, correct reinforcement placement, complete grout filling, and inspection at each stage.
Step-by-Step Guide to Installing Precast Walls with Connecting Loops
Step 1: Plan the Connection Layout
Review the construction drawings, joint dimensions, loop locations, and reinforcement details. Confirm loop numbers and positions against the structural design, and resolve discrepancies before production begins.
Step 2: Position Connecting Loops During Precast Production
Secure the loop boxes in the correct locations and prevent movement during concrete placement. Check orientation, cover, and the housing face position relative to the panel edge, and record the checks before casting.
Step 3: Prepare the Loops After Demolding
Remove the protective covering and expose the loops according to the manufacturer's instructions. Inspect the recess for contamination or damage and clean it as required.
Step 4: Erect and Align the Wall Panels
Lift, position, and temporarily stabilise the panels using the approved erection procedure and designated lifting points, setting each panel to line and level before the connection is made.
Step 5: Connect the Loops and Install Reinforcement
Align the designated loops of adjacent panels and install the specified reinforcing bars in accordance with the approved drawings. Confirm bar diameter, lap length, and position before the joint is closed.
Step 6: Complete Joint Formwork and Grouting
Seal the joint, place the specified grout or concrete material, and check filling quality. Work the material into the recess to avoid voids, and follow the applicable curing requirements.
Step 7: Inspect the Completed Connection
Verify alignment, joint filling, curing provisions, and acceptance criteria before proceeding, and document the inspection in line with the project's quality plan.
Key Benefits of Connecting Loops for Construction Projects
Faster and More Organized Installation
The connection point is available as soon as the panel is set, so joint work follows the erection sequence instead of waiting for a separate trade.
Reduced On-Site Adjustment and Rework
Accurate loop positioning and matching joint details limit the shimming, cutting, and re-detailing required at the panel face.
Reliable Load Transfer When Properly Designed and Installed
With correct engineering, compatible reinforcement, and complete grouting, the connection develops the load path assumed in the structural design.
Compatibility with Different Precast Wall Configurations
Loops are produced in a range of sizes, allowing them to suit different panel thicknesses, joint details, and wall assemblies.
Better Coordination Between Precast Production and Site Assembly
A detail defined in production and completed on site creates a clear handover between the precast plant and the erection team.
Common Applications of Connecting Loops
Residential Buildings
Connections between precast wall panels in housing projects, where repetitive layouts and consistent joint details support a steady erection cycle.
Commercial Buildings
Wall assemblies for offices, retail developments, and comparable structures, including internal walls and façade elements requiring a clean joint line.
Industrial Facilities
Precast wall systems in factories, warehouses, and logistics buildings, where large panels and long wall runs benefit from a straightforward detail.
Modular and Repetitive Construction
Projects with standardized panel layouts and repeatable details benefit most, since one procedure applies across many identical joints.
How to Choose the Right Connecting Loops for Precast Walls
Connection Design and Load Requirements
Confirm the intended function of the connection, the load path it must develop, and the specifications that apply. Product selection follows the design, never the reverse.
Loop Dimensions and Joint Geometry
Check wire length, loop configuration, joint depth, and panel thickness together. A loop that suits one joint detail may not fit another.
Material and Corrosion Protection
Evaluate material quality and protective finishes against the exposure conditions of the finished structure, from interior walls to exterior environments.
Manufacturing Consistency and Quality Inspection
Review dimensional tolerances, material traceability, inspection procedures, and the test documentation available for a given production batch.
Supplier Support and Customization
Assess drawing review, specification confirmation, production consistency, packaging, and delivery coordination, since these determine whether the correct product arrives on time.
Common Installation Mistakes and How to Prevent Them
Most problems originate in planning, production, or workmanship rather than in the product itself.
- Incorrect loop positioning during casting — check boxes against the shop drawings before and after placing concrete.
- Damage to loops or housings — handle panels carefully during stripping, storage, transport, and lifting.
- Misalignment between adjacent panels — coordinate setting-out, tolerances, and joint details before erection.
- Incorrect bar placement or incompatible joint details — verify diameter, lap length, and position against approved drawings.
- Incomplete grout filling or curing — follow the supplier's placing and curing requirements and check filling at each joint.
- Unapproved procedures or missing inspections — use a documented sequence, competent crews, and recorded checks.
Connecting loops simplify precast wall installation by moving the connection point into the factory. The loop, its housing, and the recess are produced with the panel, so the site team is left with a short, repeatable joint procedure instead of a fabrication task. The result is better coordination between precast plant and erection crew, less adjustment work at the panel face, and a detail that behaves the same way on every panel.
Their performance, however, rests on correct engineering, accurate placement, compatible reinforcement, and proper installation and inspection. A well-specified loop installed without attention to lap length, grout filling, or curing will not deliver the connection the design intended. Contractors, precast manufacturers, and procurement teams are invited to contact HULK Metal to discuss their connecting loop specifications, customization options, and project requirements.
Article Navigation
PRECAST CONCRETE ACCESSORIES
Other Precast Concrete Accessories You Might Want to Know
You can click to learn more about HULK Metal precast concrete accessories such as lifting anchors, precast sockets, spread anchors, shuttering magnets, cast-in channels, wire loop boxes, and other precast concrete accessories you might want to know.